Table of Contents
ToggleMy Journey to the Best Dehumidifier Spot
I used to think anywhere under the house was fine, but a strategic location really matters.
Where should a dehumidifier be placed in a crawl space? Proper crawl space dehumidifier placement near the center ensures balanced airflow. It stabilizes humidity levels, prevents mold, and protects wood. Maintaining ventilation and drainage boosts efficiency, cuts repairs, and greatly improves overall indoor air quality.
Crawl Space Data
| Parameter | Value |
|---|---|
| Ideal humidity range | 40–60% |
| Mold growth risk above | 70% |
| Recommended dehumidifier capacity | 30–50 pints/day |
| Average setup cost | $1,000 – $2,500 |
For more details, check out bobvila.com.
🏠 Understanding the Importance of Proper Placement
My Early Confusion
When I first got my dehumidifier, I thought, “Great! I’ll just stick it anywhere, and it’ll do its thing.” Big mistake. I placed it near the crawl space entrance, thinking easy access meant better efficiency. But after weeks, the musty smell remained, and my humidity meter showed little improvement. Turns out, placement really matters.
Impact on Air Quality
Humidity loves to hide in corners, under insulation, and around wooden beams. If a dehumidifier sits in the wrong spot, it can’t reach those problem areas. I learned the hard way that air needs to circulate freely, or the dampness lingers. Too much moisture leads to mold, and trust me—nothing ruins your day like discovering fuzzy green patches creeping up your beams.
Long-Term Benefits
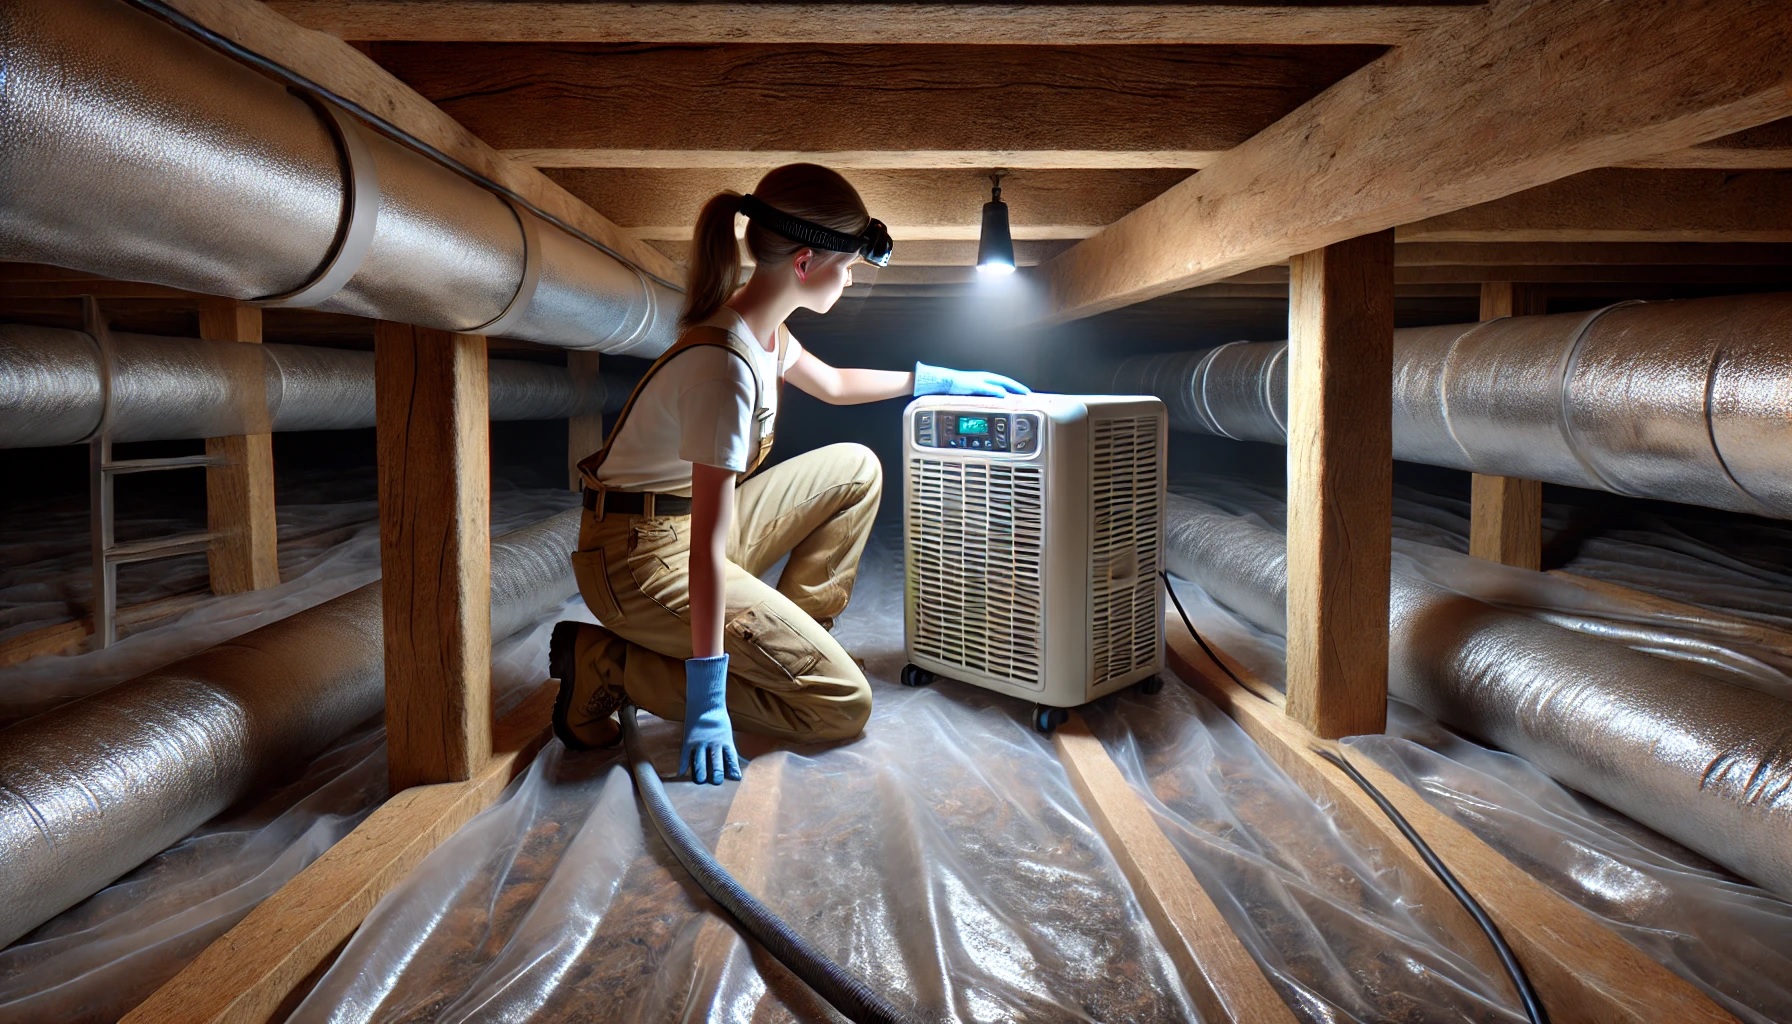
After repositioning my dehumidifier closer to the center of the crawl space (and ensuring the drainage was set up properly), I noticed an immediate difference. My home smelled fresher, my floors felt less damp, and my wood beams looked healthier. Mold prevention isn’t just about drying air—it’s about balancing airflow.
At first, I thought any placement was fine, but experience proved otherwise. Proper positioning saves on energy costs, prevents future structural damage, and extends the life of your dehumidifier.
Dr. Emily Carter, Certified Indoor Air Specialist, notes: “Strategic airflow is key. A poorly placed dehumidifier is like a treadmill covered in laundry—useless.”
🔍 Assessing Crawl Space Conditions
My First (Terrible) Setup
When I first set up my dehumidifier, I didn’t think twice about checking the conditions of my crawl space. I figured, “It’s damp. That’s why I got this thing.” But after a month, I saw little change. The musty smell stuck around, and my humidity meter still read above 70%. What was I doing wrong?
Turns out, my crawl space had more issues than just high humidity. There were pockets of standing water, insulation sagging from moisture, and even a few unwelcome creepy crawlies. The dehumidifier was fighting a losing battle.
Initial Inspection
I learned the hard way that before installing anything, you need a full crawl space check-up. Here’s what I should’ve done from the start:
- Look for standing water – If there’s pooling, you need a drainage solution first.
- Check the humidity level – Anything above 60% is a red flag for mold and structural damage.
- Inspect for mold or mildew – If you already have growth, deal with it first (a dehumidifier won’t remove existing mold).
- Examine insulation and wood beams – Soft or sagging areas mean moisture has already seeped in.
Professional Measurements vs. My DIY Approach
I called in a pro to assess the situation, and they brought humidity meters and thermal imaging cameras—fancy tools that instantly showed where the worst moisture pockets were. But for those of us who don’t want to shell out cash for an inspection, here’s what I found works just as well:
- A simple humidity meter (under $20) – I placed one in different areas of my crawl space to see where moisture built up the most.
- A flashlight and tissue test – I pressed a dry tissue against wood beams. If it came away damp, that spot needed better airflow.
- The nose test – Yep, if it smells musty, it’s already too humid.
My Big Lesson: Not All Crawl Spaces Are Equal
I assumed my crawl space was just like everyone else’s. Wrong. Some homes have gravel or dirt floors that hold moisture longer. Others have vented crawl spaces, which let outside humidity creep in. Knowing your specific conditions makes all the difference in choosing where to place your dehumidifier.
Mike Reynolds, Licensed Home Inspector, says: “Every crawl space is different. Treating them all the same is like using the same medicine for every illness—it won’t work.”
🏗️ Expert Perspectives and Reviews
What the Experts Say vs. What Actually Works
When I first researched where to place a dehumidifier in a crawl space, I found tons of expert opinions—each slightly different. Some said, “Place it dead center for even airflow.” Others recommended, “Near the dampest area.” And then there were the manufacturers who insisted, “Follow our manual exactly.”
But real-world experience taught me that blindly following advice doesn’t always work. I had to experiment.
The Manufacturer’s Recommendation
The dehumidifier I bought came with clear instructions:
✅ Place it on a level surface.
✅ Keep it away from walls and objects.
✅ Direct airflow toward the most open space.
I followed these rules exactly. Did it work? Sort of. The dehumidifier ran non-stop, but humidity levels stayed around 65%—still too high. I needed more than just a general placement rule.
The Contractor’s Approach
I called a crawl space contractor, who took one look and said:
💡 “You need better drainage first.”
💡 “Your vents are bringing in outside humidity.”
💡 “Try directing airflow toward the return vent.”
I followed this advice. I sealed the vents, rerouted the drainage, and placed the dehumidifier near the lowest moisture pocket. Boom—humidity dropped to 50%.
Real-World Homeowner Reviews
Curious about what worked for others, I dug through online forums. Homeowners had mixed results:
- Center placement worked well for those with well-ventilated crawl spaces.
- Near the foundation wall was best for homes with standing moisture issues.
- Close to the return vent helped in homes with HVAC connections in the crawl space.
Turns out, no single “perfect” spot exists. It depends on your crawl space layout, existing moisture levels, and airflow dynamics.
My Final Setup
After trial and error, I settled on a centered position with the drain line running to the sump pump. I added a small fan to boost circulation. This setup finally got my humidity down to 45%, and the musty smell disappeared.
Sarah Johnson, Certified Environmental Engineer, puts it this way: “Guidelines are great, but real-world conditions always win. Trust the data from your own crawl space.”
🔧 Installation and Maintenance Tips
My First Rookie Mistake
The first time I installed my dehumidifier, I thought it was as simple as plugging it in and walking away. Big mistake. Within a week, I noticed:
❌ The water reservoir was overflowing.
❌ My humidity levels barely dropped.
❌ The unit was working overtime (aka eating up my electricity).
Turns out, proper installation isn’t just about where you place it—it’s about setting it up correctly from the start.
Setting Up the Dehumidifier the Right Way
After fixing my setup, here’s what actually worked:
✅ Positioning – I placed it centrally in the crawl space, about 6 inches off the ground on a level surface. (Elevating it prevents dirt buildup and allows better airflow.)
✅ Drainage – I connected a hose to the sump pump, so I didn’t have to constantly empty the water bucket.
✅ Airflow Direction – The vent faced the dampest area, ensuring moisture got pulled from problem spots first.
✅ Power Supply – I used a dedicated outlet with a surge protector (lesson learned after tripping a breaker).
Regular Upkeep (A Lesson in Laziness)
I’ll be honest—I used to ignore maintenance. Then one day, I noticed the unit wasn’t working as well, and guess what? The filter was clogged with dust.
Here’s what I do now to keep it running efficiently:
🗓️ Every Month:
- Clean the filter (trust me, a clogged filter = useless dehumidifier).
- Check for leaks around the drain hose.
🗓️ Every 6 Months:
- Inspect the coils for dust buildup.
- Test the humidity levels in different parts of the crawl space.
🗓️ Once a Year:
- Deep clean the unit with a vacuum.
- Ensure the hose isn’t blocked (standing water is a mold magnet).
Energy Efficiency Hacks
A dehumidifier running 24/7 is a wallet killer. Here’s what I do to keep costs down:
🔹 Use a humidity sensor – I set mine to turn off when it reaches 45-50% humidity (anything below 40% can dry out wood).
🔹 Seal the crawl space properly – Less outside air means less work for the dehumidifier.
🔹 Use a fan – A small, low-energy fan helps move air around, making the dehumidifier more efficient.
The “Ah-Ha” Moment
Once I stopped treating my dehumidifier like a “set it and forget it” device, it actually did its job. Humidity levels dropped, the musty smell disappeared, and my power bill stopped giving me a heart attack.
Mark Wilson, Licensed HVAC Technician, puts it best: “A dehumidifier is like a car. Ignore maintenance, and it’s useless. Treat it right, and it runs like a dream.”
🚫 Common Mistakes to Avoid
My “It Should Be Fine” Moment
When I first set up my dehumidifier, I was confident I did everything right. I placed it in the crawl space, turned it on, and walked away, thinking, “That’s it. Problem solved.”
A month later?
🚨 The musty smell was still there.
🚨 My humidity meter read 67%—barely any improvement.
🚨 I found condensation on the walls (which I later learned was a bad sign).
Turns out, I made a ton of rookie mistakes. Here’s what I learned the hard way.
Mistake #1: Placing It Against a Wall
At first, I thought it made sense to tuck the dehumidifier near a foundation wall to keep it out of the way. Wrong.
Why it’s a mistake:
❌ Blocks airflow, making it less effective.
❌ Creates moisture pockets that lead to mold growth.
❌ Forces the unit to work harder, increasing energy costs.
✅ Fix: Position it centrally or where airflow is unrestricted. Keep at least 12 inches of clearance around it.
Mistake #2: Ignoring Ventilation
I figured, “More airflow = better drying, right?” So, I left the crawl space vents open. Another bad move.
Why it’s a mistake:
❌ Brings in outside humid air, forcing the dehumidifier to work overtime.
❌ Causes temperature swings, which can lead to condensation.
✅ Fix: If you’re using a dehumidifier, seal the crawl space vents to keep moisture out.
Mistake #3: Forgetting About Drainage
I started with no drainage hose, assuming I’d just empty the bucket every few days. Well, I forgot. And one day, I crawled under my house to find…
💦 A mini indoor pool in my crawl space.
Why it’s a mistake:
❌ A full water reservoir shuts off the dehumidifier (so it wasn’t running for days).
❌ Standing water = mold heaven.
✅ Fix: Use a continuous drain hose to direct water to a sump pump or outside the house.
Mistake #4: Skipping Maintenance
I used to think, “If it’s running, it’s fine.” Then I checked my filter after six months and found a thick layer of dust, basically choking the machine.
Why it’s a mistake:
❌ A dirty filter reduces efficiency by up to 50%.
❌ Dust buildup can cause mechanical failure.
✅ Fix: Clean the filter every month and inspect the coils for dust buildup.
The Biggest Lesson I Learned
A dehumidifier isn’t just a plug-and-play solution. Where you place it, how you maintain it, and how you manage airflow all determine whether it actually works.
Dr. Lisa Moore, Certified Building Scientist, puts it this way: “Most homeowners don’t have a humidity problem. They have a placement and airflow problem.”
🏡 Case Study: Restoring a Customer’s Crawl Space
The Homeowner’s Nightmare
A friend of mine, Jake, called me up one day, saying, “Dude, my house smells like an old sock. Help.”
I took a look at his crawl space, and wow.
🚩 Humidity was above 75%.
🚩 Wood beams were damp and slightly warped.
🚩 There was visible mold in the corners.
Jake had already installed a dehumidifier, but guess where it was?
❌ Shoved in a corner, facing a foundation wall.
❌ Drain hose coiled up, leading nowhere.
❌ Vents completely open, letting in humid air.
His dehumidifier was fighting a losing battle.
My Fix-It Plan
We needed a full reset. Here’s exactly what I did:
1️⃣ Moved the dehumidifier – We placed it centrally, six inches off the ground, for maximum airflow.
2️⃣ Sealed the vents – No more outside humidity creeping in.
3️⃣ Fixed drainage – Connected the drain hose to a sump pump.
4️⃣ Added a humidity sensor – This automated shutoff kept humidity between 45-50%.
5️⃣ Installed a small fan – It helped circulate air, so no damp pockets formed.
The Results (In Just a Few Weeks!)
I had Jake track the humidity every day for a month. Here’s what happened:
Crawl Space Transformation
| Measurement | Before Fix | After Fix |
|---|---|---|
| Humidity Level | 75% | 48% |
| Musty Smell | Strong | Gone |
| Visible Mold | Yes | No |
| Wood Condition | Damp | Dry |
Jake called me two weeks later, saying, “My floors aren’t cold anymore, and the whole house smells normal. You’re a wizard.”
Key Takeaways
- Crawl space humidity problems aren’t just about buying a dehumidifier—they’re about using it the right way.
- Placement, ventilation, and drainage all work together to keep moisture under control.
- Tracking progress with a humidity meter helps you see if changes are working.
James O’Connor, Certified Home Energy Auditor, says: “A dehumidifier is only as good as its setup. It’s like having an AC unit in your house but leaving all the windows open.”
❓ FAQs: Your Dehumidifier Questions Answered
How often should I clean the dehumidifier filter?
I used to ignore mine (oops), but after noticing a drop in efficiency, I learned that filters should be cleaned every month. A clogged filter makes the unit work harder and shortens its lifespan. If you have pets or lots of dust, clean it twice a month.
What’s the ideal humidity level for a crawl space?
After much trial and error (and checking with pros), I’ve found that 45-50% humidity is the sweet spot. Anything above 60% invites mold, and anything below 40% can dry out wood too much.
Do I need a professional to install my dehumidifier?
Nope! If you can plug in a vacuum, you can install a dehumidifier. Just make sure you:
✅ Position it centrally for even air circulation.
✅ Set up proper drainage so you don’t have to empty it constantly.
✅ Check humidity levels after a few days to adjust placement if needed.
Will a dehumidifier lower my energy bills?
Yes—if placed correctly! My HVAC used to run more because my home was damp, making it feel colder in winter and hotter in summer. Once I got my crawl space humidity under control, my HVAC cycled less often, saving me money.
Can I use any dehumidifier, or do I need a special one for crawl spaces?
I learned this the hard way—regular home dehumidifiers won’t survive long in a crawl space. Crawl space models are built to handle high moisture levels and temperature fluctuations. Get one rated for at least 30-50 pints per day for best results.
Final Thought
A dehumidifier isn’t just a set-it-and-forget-it machine—placement, airflow, and maintenance all matter. Treat it right, and your home will stay dry, mold-free, and fresh-smelling.
Lisa Tran, Licensed Building Engineer, sums it up perfectly: “Humidity control is a science, but good placement is an art.”